 Kuvo Code
Sessions
Open projects, start sessions, talk to the agent, and answer what it asks.
Kuvo Code’s window has three parts: your projects and sessions in the sidebar, the conversation in the middle, and the side panel on the right. Open sessions also show as tabs in the title bar. ⌘ W closes a tab and ⇧ ⌘ T brings it back. To hide the tab bar, the row with the project, its branch and the tabs, choose View › Hide Tab Bar (⌥ ⌘ T) or turn it off in Settings › General. The cards then reach the top of the window, with the sidebar button next to the window’s own. Switch sessions in the sidebar or with ⌘ K, and show or hide the panel with ⌥ ⌘ 0.
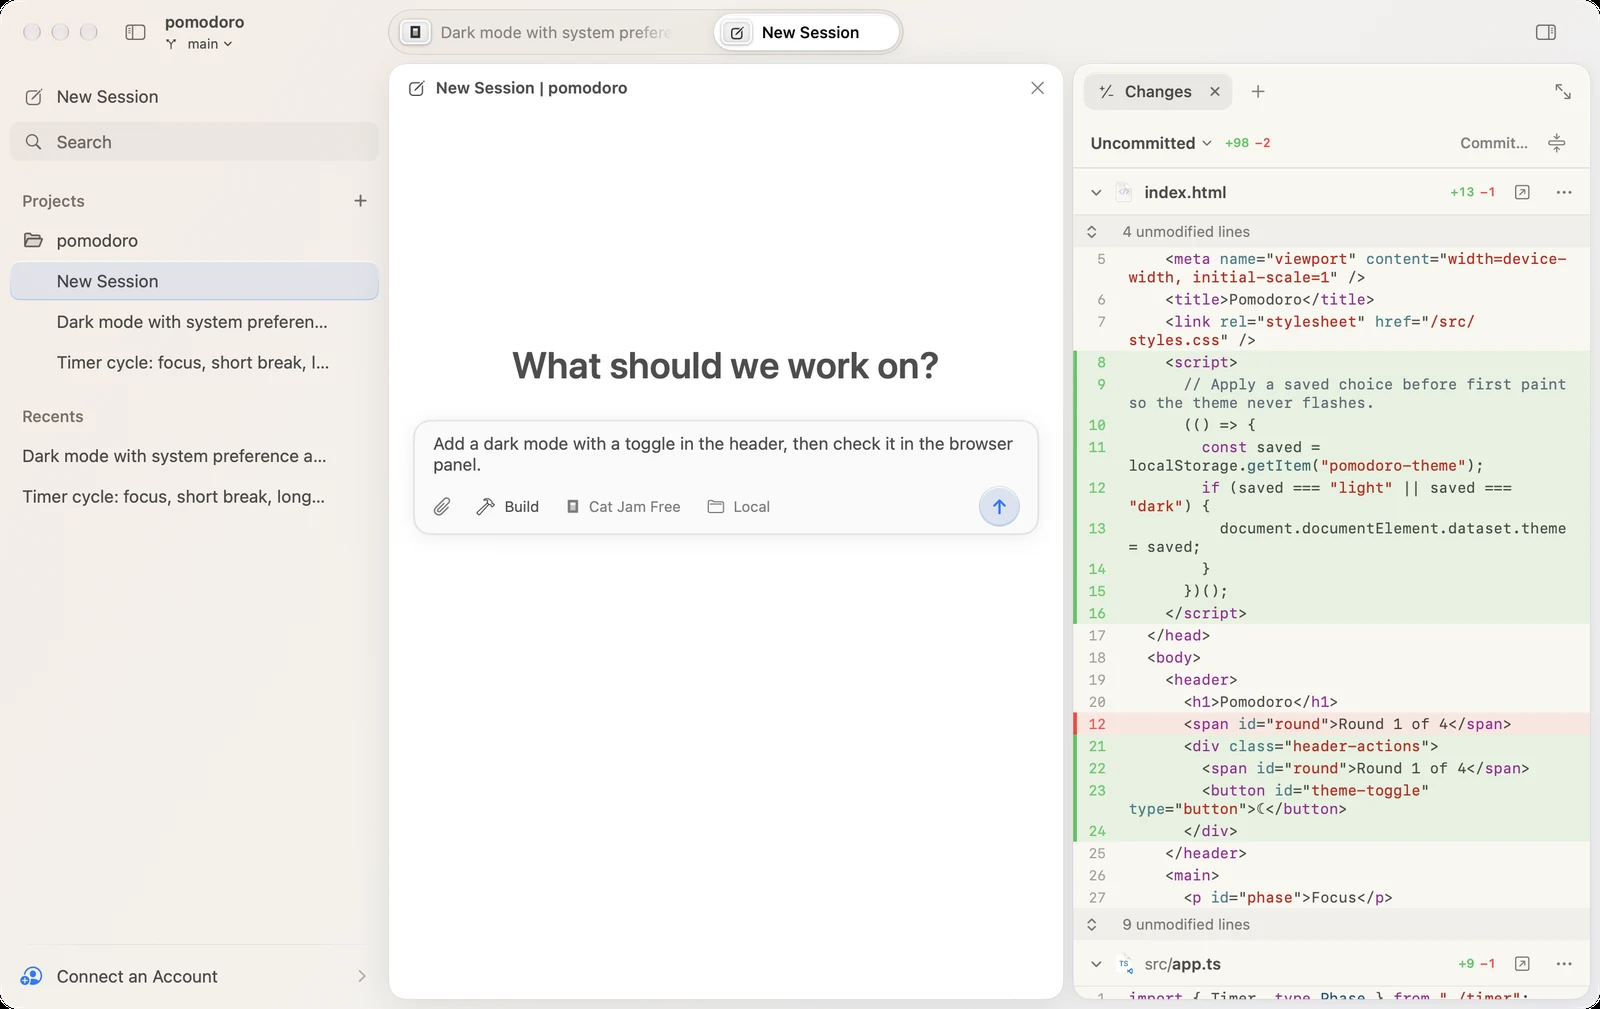
Projects and sessions
A project is one or more folders the agent works in. Click + next to Projects, or press ⇧ ⌘ N, to name a project and add its folders. Sessions run in the primary one; the agent can read and change the others too, and knows them by name, so you can say “in the api folder”. Right-click a project and choose Edit Project… to rename it or add and remove folders, or Open In to open it in your editor, terminal or git app. Open Folder… (⌘ O) makes a project of a single folder. So does dropping a folder on Kuvo Code’s Dock icon, or opening it with Kuvo Code from the Finder or with open -a "Kuvo Code" <folder>.
The title bar shows the project and its git branch; click the branch to switch to another one or start a new one.
A session is one conversation with the agent; start another with ⌘ N. Right-click the Dock icon for your latest sessions and New Session.
To find a session, type in the search field at the top of the sidebar: it matches session titles and project names, and under In Conversations, what was said in them. Click one of those to open it with Find showing the match. Or press ⌘ K for the command palette, which finds sessions in every project, the project’s files, and anything the menus and Settings do, with their shortcuts. Right-click a session to pin it to the top of the sidebar, rename it, show it in the Finder, copy or export it as Markdown, archive it or delete it; right-clicking its tab renames it too. The Markdown has your messages, the agent’s replies and a line for each step it took. Archived sessions leave the sidebar’s lists, but searching still finds them. Deleting can’t be undone, so Kuvo Code asks first.
Each session shows how it’s doing in the sidebar and on its tab:
- Spinner: working.
- Orange hand: waiting for you to answer.
- Red mark: the last run failed.
- Dot: finished while you were elsewhere.
When a session finishes or needs your answer while you’re in another app, Kuvo Code sends a notification; click it to open the session. When the agent asks for permission, the notification’s Allow, Always Allow and Deny buttons answer it without switching apps. The Dock icon counts the sessions waiting for you. Turn both off in Settings › General.
Talking to the agent
Type in the composer at the bottom and press Return. While the agent works, Return adds your message to the task, and the agent reads it at its next step. ⌘ Return queues it instead, for when the agent is done; queued messages go one after another. What you type stays in the composer when you switch sessions or quit.
Messages waiting for the agent are listed above the composer. The arrow, Send Now, stops the agent’s current step and gives it that message; the pencil puts it back in the composer to edit (or press ↑ in an empty composer), and × removes it. To stop the agent, press ⌘ . or Esc; the queue then waits until you click Resume.
Type / at the start of a message for the engine’s commands: /init sets up an AGENTS.md that tells the agent about your project, and /review reviews your uncommitted changes (or a commit, branch or pull request you name after it). Return runs the highlighted one; Tab lets you add to it first.
Below the field:
- Mode: Build makes changes; Plan explores and plans without changing files. Switch with ⌥ ⌘ 1 and ⌥ ⌘ 2. Under a plan, Build It switches to Build and has the agent carry it out. The same menu’s Tool Permissions chooses Approve All, the default, or Ask First, which asks before the agent edits files or runs commands.
- Model: any model from your accounts, and an Effort level for models that reason.
- Local or Worktree, in a new session in a git project: where the agent works (see below).
The ring at the top of the conversation shows how full the model’s context window is. Click it to see the numbers, what the session has cost, and your plan’s limits when the usage item follows that account. Summarize Now there shrinks the conversation to a summary, to make room before it fills up.
Worktrees
To have the agent work apart from your own checkout, pick Worktree instead of Local in a new session’s composer. The session gets its own copy of the project, a git worktree on a new branch named after the session, starting from your last commit, so several sessions can work at once without touching each other’s files or yours. A branch mark on its row shows it, and the title bar names the branch. New sessions keep the choice you made last. To have several agents try the same task, pick a number under Attempts in that menu: each gets a worktree of its own, so you can compare what they did and keep the best.
The Changes tab shows everything the branch changed. When the work is ready, the branch menu there merges it into your branch, or pushes it and opens a pull request. Archiving or deleting the session offers to remove its worktree; the branch and its commits stay.
Worktrees only have what git has. To install dependencies or copy files like .env into each new one, set a setup command under Worktree Setup in Edit Project…. It runs in each new worktree before its session starts, with $OPENCODE_WORKTREE_BASE set to the project’s folder, as in npm install && cp "$OPENCODE_WORKTREE_BASE/.env" ..
Attachments
Type @ to mention one of the project’s files, from any of its folders: the list starts with the files changed last, and narrows as you type part of a name. Pick one with ↑ ↓ and press Return or Tab. The agent opens it when it needs it.
Drop, paste or pick files of any kind with the paperclip. Text, pictures, PDFs and folders go to the model; anything it can’t read goes as a path the agent can open. Click a picture in the conversation to look closer in Quick Look; double-click opens it in its app.
When the agent asks
When the agent needs permission or has a question, a card appears above the composer. Allow it once, always, or deny it; or pick or type an answer.
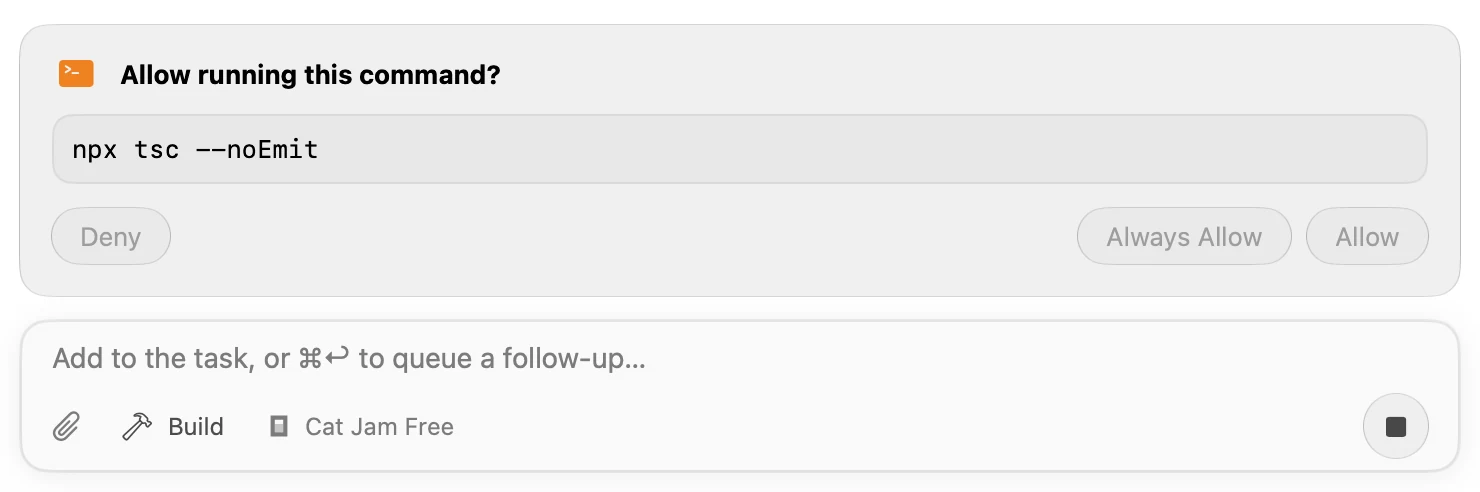
The transcript
Replies, thinking, and every step the agent takes appear as they happen. Click an edit to see the change, a command or code the agent ran to see its output, or a file a reply names to open it in the panel; right-click a step about a file to open that file in the panel. To find something said earlier, press ⌘ F. A long message of yours, like a pasted log, shows its first lines until you click Show More.
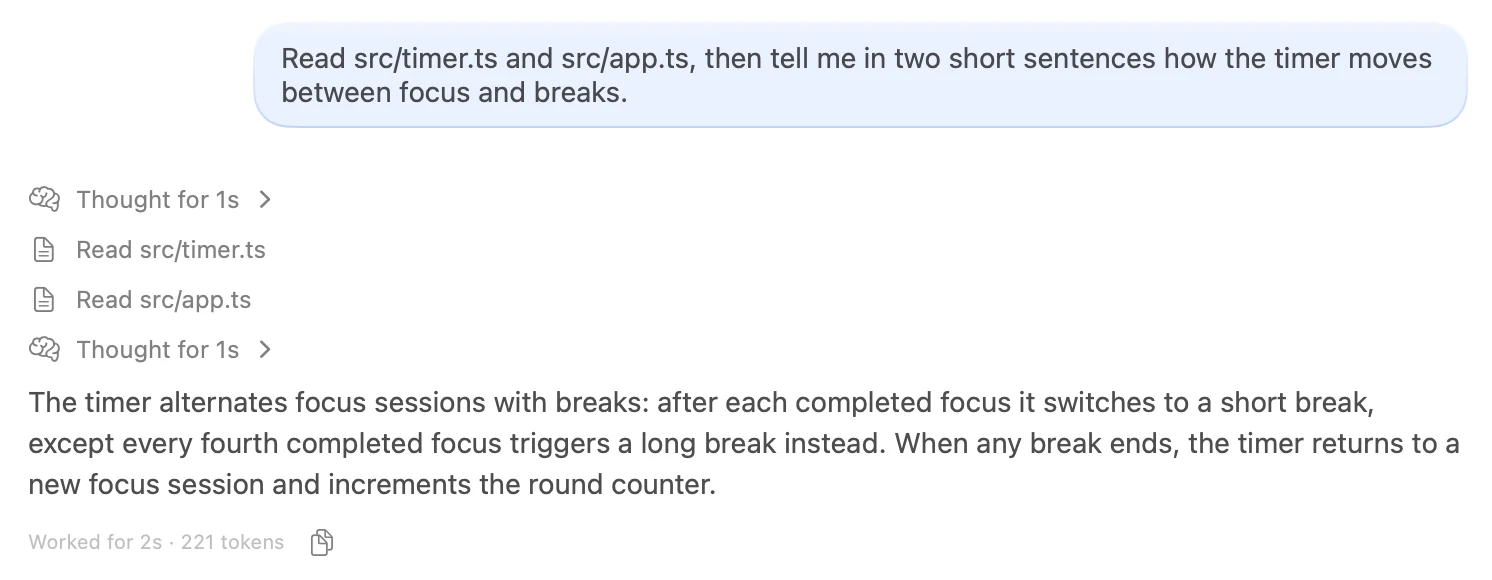
The agent can hand part of a task to a subagent, such as explore for searching the code. Its step opens while it works, showing what it was asked, each step it takes, what it found and what it used; click the step to fold it. Under a reply, Edited 3 files (or however many) lists what that turn changed; click a file to open it in the panel. The copy button under a reply copies it. A code block shows its language, line numbers (which selecting and copying leave out) and its own Copy button. Hover over one of your messages to see when you sent it, and for its buttons: copy, start a new session from it, or undo from it. If a run fails, Try Again under the error sends your last message again, after changing the model if you like.
Undoing
Under one of your messages, the curved arrow (Undo From Here) takes the session back to before it: the conversation, and the files the agent changed since. The message comes back to the composer to edit or send again. Until you send something, Redo brings it all back.
To try another way without losing this one, click the branch (New Session From Here) instead: a new session starts with the conversation up to that message, which waits in its composer. Files aren’t copied; both sessions work in the same folders.